Hexo 集成 Giscus 评论系统完整指南
📘 一、Giscus 简介
Giscus 是一个基于 GitHub Discussions 的现代评论系统,支持 Markdown、暗黑模式、Reactions,并通过 GitHub OAuth 实现身份识别。它不需要额外数据库,适用于技术博客、文档站点等。
volantis默认支持 Giscus,所以选择了这个插件系统。
🚀 二、准备工作
2.1 拥有一个公开 GitHub 仓库
确保你的博客源代码所在的仓库是公开的。
2.2 Hexo 安装与主题准备
本文以 Volantis 主题为例,你应已完成以下操作:
- 安装 Hexo
- 配置并使用 Volantis 主题
- 启用 Hexo 的 deploy 功能(如
hexo-deployer-git)
🔧 三、GitHub 端配置
3.1 启用 Discussions 功能
- 进入你的 GitHub 仓库主页
- 点击菜单栏的【Settings】→ 左侧【Features】 → 勾选 Discussions
3.2 创建 Discussion 分类
- 打开仓库的 Discussions 页面
- 点击右上角 ⚙️ Settings
- 创建一个新分类,建议类型为 Announcements
- 复制该分类的名称(如
General)和 ID(通过 giscus.app 获取)
3.3 安装 Giscus GitHub App
- 打开 https://github.com/apps/giscus
- 点击【Install】
- 选择你博客所用的仓库进行授权
⚙️ 四、使用 Giscus 配置生成器
访问 https://giscus.app 进行配置:
- Repository:填写
yourname/yourrepo
- Category:选择刚才创建的分类
- Mapping:选择
pathname(推荐)
- Input position:选择
Top
- Theme:
light 或 preferred_color_scheme
- Language:选择
zh-CN
建议启用的特性
- ✅ Enable reactions for the main post
- ✅ Load the comments lazily
- ❌ Emit discussion metadata(一般不必)
- ✅ Place the comment box above the comments
点击底部【Copy code】,复制生成的配置 JSON 内容。
🛠️ 五、Hexo 中集成 Giscus(Volantis 主题)
5.1 配置主题文件
编辑文件:
1
| themes/volantis/layout/_plugins/comments/giscus/script.ejs
|
确认已有以下内容:
1
2
3
4
5
6
7
8
9
10
11
12
13
14
15
16
17
18
19
20
21
22
23
24
25
26
27
28
29
30
31
32
33
34
35
36
37
38
39
40
41
42
43
| <script>
volantis.layoutHelper("comments",`<div id="giscus_container"></div>`)
volantis.giscus = {};
function check_giscus() {
if (volantis.dark.mode === "dark") {
volantis.giscus.Theme = '<%- theme.comments.giscus.theme.dark %>';
} else {
volantis.giscus.Theme = '<%- theme.comments.giscus.theme.light %>';
}
return document.getElementById("giscus_container");
}
function p_giscus() {
const HEAD = check_giscus();
if (!HEAD) return;
let cfg = Object.assign(<%- JSON.stringify(theme.comments.giscus) %>,pdata.commentConfig)
const script = document.createElement('script');
script.setAttribute('src', 'https://giscus.app/client.js');
Object.keys(cfg).forEach(k=>{
if (k != "theme") {
script.setAttribute('data-'+k, cfg[k]);
}
})
script.setAttribute('data-theme', volantis.giscus.Theme);
script.setAttribute('crossorigin', "anonymous");
HEAD.appendChild(script);
}
function dark_giscus() {
const HEAD = check_giscus();
if (!HEAD) return;
const message = {
setConfig: {
theme: volantis.giscus.Theme
}
};
const giscusIframe = document.querySelector('iframe.giscus-frame');
giscusIframe.contentWindow.postMessage({ giscus: message }, 'https://giscus.app');
}
p_giscus();
volantis.dark.push(dark_giscus);
</script>
|
5.2 主题配置文件 _config.yml (theme目录下的)
1
2
3
4
5
6
7
8
9
10
11
12
13
14
15
16
| comments:
giscus:
repo: yourname/yourrepo
repo-id: YOUR_REPO_ID
category: General
category-id: YOUR_CATEGORY_ID
mapping: pathname
strict: 0
reactions-enabled: 1
emit-metadata: 0
input-position: top
theme:
light: light
dark: dark_dimmed
lang: zh-CN
loading: lazy
|
🧪 六、本地调试与错误排查
在调试过程中,我遇到了一些比较典型的问题,这里记录下来以供参考。
6.1 常见问题
An error occurred: giscus is not installed on this repository
一开始我没注意到要安装 Giscus 的 GitHub App,导致一直报这个错。后来在 https://github.com/apps/giscus 页面安装之后问题解决了。
403 Forbidden: repo=undefined
这个问题出现在我忘记正确填写主题配置文件中的 repo 和 repo-id。另外要注意,相关配置必须写在 themes/volantis/_config.yml 中,而不是_config.volantis.yml文件。
📤 七、部署与 Git 提交
使用以下 deploy.sh 自动部署脚本:
1
2
3
4
5
6
7
8
9
10
11
12
13
14
15
16
17
18
19
20
21
22
23
| #!/bin/bash
set -e
echo "🧹 Cleaning cache and public folder..."
hexo clean
echo "📦 Generating static files..."
hexo generate
echo "🚀 Deploying to GitHub Pages..."
hexo deploy
echo "✅ Hexo deploy finished."
echo "📁 Committing source code..."
git submodule foreach 'git add . && git commit -m "update submodule" || echo "No changes in submodule"'
git add .
read -p "📝 Enter commit message: " msg
git commit -m "$msg"
git push origin main
echo "🎉 All done!"
|
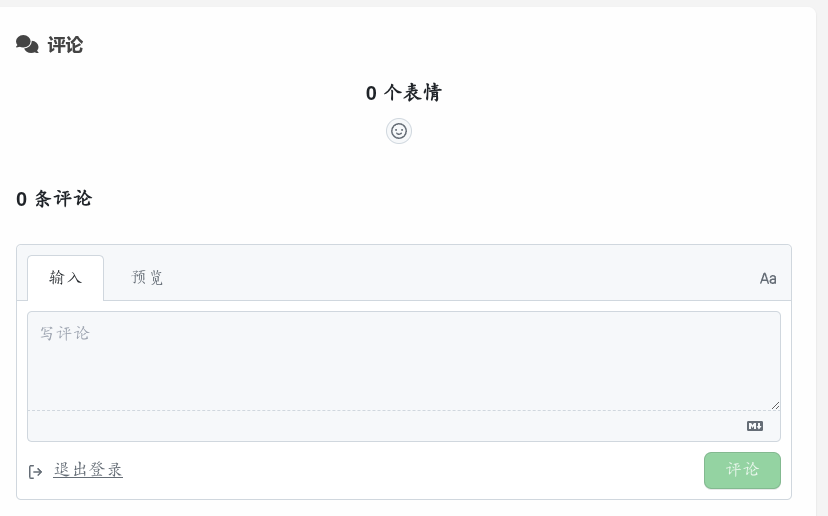
✅ 八、效果预览与总结
在部署完成后,我访问了博客页面,Giscus 评论区成功加载。它的加载速度很快,界面简洁,支持登录用户互动,还能显示 emoji reactions。
这次集成体验整体比较顺利,唯一花时间的是理清配置的几个关键点。整体来看,Giscus 的无后端、无广告、与 GitHub 无缝集成等特点,非常契合我的博客需求。如果你也在使用 Hexo 搭建博客,不妨也试试 Giscus —— 搭起来其实没那么难。